Getting Started { Using PrimerSeq }
Installation
- Download the latest version from sourceforge
- Follow the installation instructions:
Example
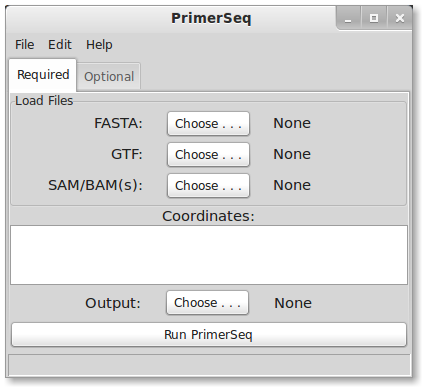
When you start PrimerSeq, you should see a graphical interface similar to the below image, although aesthetics may differ depending on your OS.
Loading Data
To load sample data, press File -> Load Quick Ex. in the top menu. The sample data should take only a few seconds to load. The RNA-Seq data is from heart tissue sequenced from Illumina’s Human BodyMap 2.0 project. PrimerSeq should now look like the following:
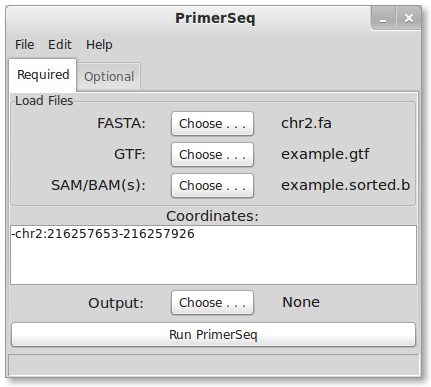
Notice that a FASTA, GTF, and BAM file is loaded for you in this example. The target exon is also specified in the coordinates text field. Target exon coordinates are specified, in order, as strand, chromosome, colon, start, dash, and end. In PrimerSeq the first nucleotide of a chromosome is 0 and end positions are not inclusive.
Next, select the text file where you wish to save the results by pressing the “Choose” button for the output.
Running PrimerSeq
After selecting an output file, run PrimerSeq by pressing the “Run PrimerSeq” button located near the bottom. A dialog should now appear indicating that primer design is in progress. Once the primer design is done, the results should appear in a new window.
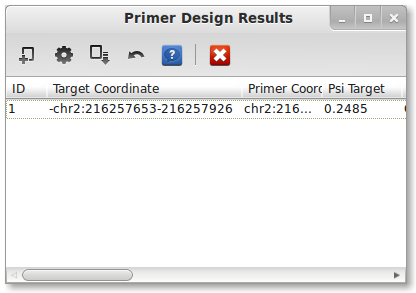
You may also find the results in a text file where you specified it previously.
Interpreting Results
Information
A PrimerSeq result consists of 14 columns, multiple results are separated by a semi-colon:
- ID - unique identifier
- Target Coordinate - user-specified target exon
- Primer Coordinates - Coordinates of upstream and downstream primer
- Psi Target - Estimated target exon inclusion level based on each BAM file
- Forward Primer - Upstream primer sequence
- Reverse Primer - Downstream primer sequence
- Average TM - Average of the two primer TMs
- Skipping Prod. Size - Product size(s) for each isoform that does not contain the target exon
- Inc. Prod. Size - Product size(s) for each isoform that does contain the target exon
- Upstream Exon Coord. - Upstream exon coordinate
- Upstream Psi - Upstream exon inclusion level
- Downstream Exon Coord. - Downstream exon coordinate
- Downstream Psi - Downstream exon inclusion level
- ASM Region - Region where alternative splicing events occur
- Gene - gene name as it occurs in the gene annotation (GTF)
Visualization
PrimerSeq allows you to visualize the results, providing a quick intuitive check of the primer design. Press the “Create Plots” button in the results window tool bar. A dialog should now appear. To plot the results, you need to specify a BigWig file and the target exon of interest (in this example there is only one). You can find a BigWig file for the example in the PrimerSeq installation directory example/example.bw. Click on the BigWig cell and then choose example/example.bw from the installation directory. Next, select the only available option in the “Select Target” drop-down list.
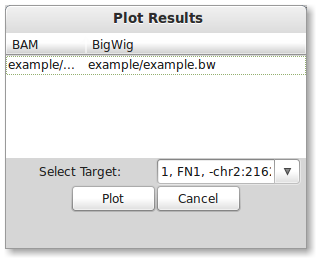
Press the “Plot” button to create a plot. If everything worked correctly, you should see the below plot. Inclusion level estimates in the below plot are based on read counts from individual SAM/BAM file(s).
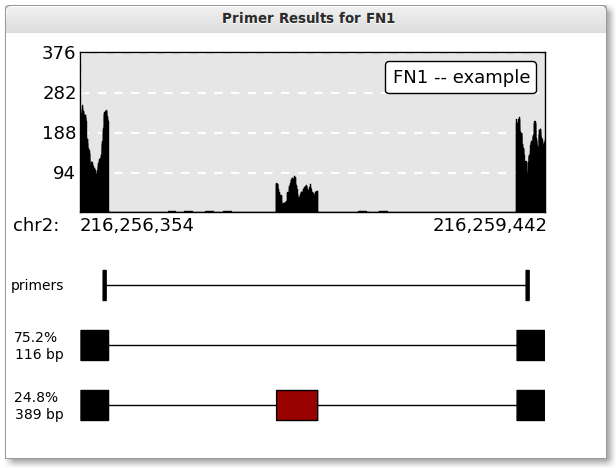
This example is of a Skipped Exon event. Skipped exons happens when a single exon is either included or not included.
In-Silico PCR
As a secondary check for primer design, you can quickly run the In-Silico PCR from UCSC Genome Browser through PrimerSeq. Press the In-Silico PCR button in the tool bar of the results window. The below dialog should now appear.
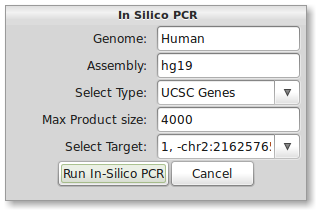
The correct input for human hg19 should be present by default. A list of commonly used genome/assembly name pairs for In-Silico PCR can be found on the FAQ page. To use other species or assemblies you will need to look at the naming on the UCSC’s In-Silico PCR webpage. Leave the In-Silico PCR type as UCSC Genes. Now select the only available option from the “Select Target” drop-down list. When ready, press the “Run In-Silico PCR” button. Your default web browser should now open the results of In-Silico PCR. The result should match the result from the PrimerSeq output.
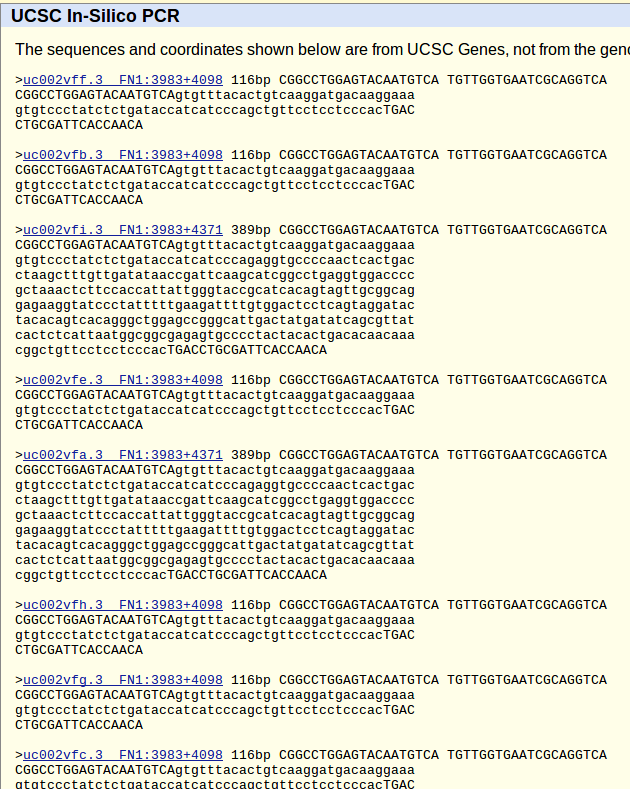
You can perform In-Silico PCR on the genome (not shown) instead of UCSC’s transcripts by selecting “Genome” from the “Select Type” drop-down. This may be necessary if you are using a GTF file from other sources like Ensembl. You will need to significantly increase the Max Product Size since the product lengths will include introns.
Using Multiple Exons
The above example just used one exon. However, PrimerSeq can design primers for many primers sequentially. In the initial GUI, press File -> Load Larger Ex.. You should see a list of ten exons now instead of just one (see below). The same heart RNA-Seq data from Illumina’s Human BodyMap 2.0 project is used like the above example.
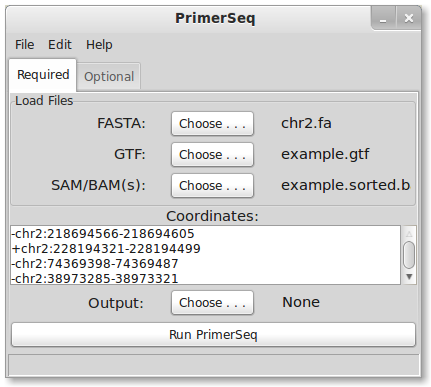
The “Coordinates” text area now has a list of coordinates for 10 exons. Next, select an output file and then press the “Run PrimerSeq” button. You should see results for 10 exons when the primer design is finished (see below).
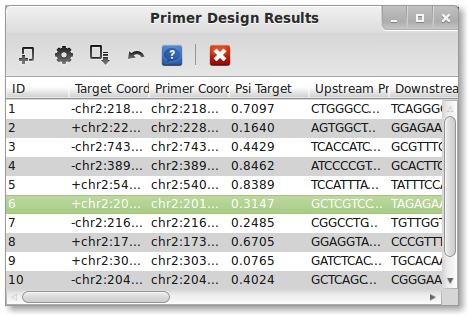
Although you can look at plots and In-Silico PCR for each exon, the easiest way is to click the “Save Plots” button (the third button from the left). This will bring up a dialog as shown below.
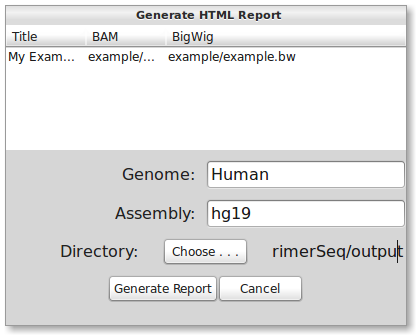
You will need to choose the BigWig file “example/example.bw” from the installation directory since it is necessary for displaying read depth. You may also edit the Title. Do not change the “Genome” or “Assembly” text fields. You will, however, need to select a directory to save the results by pressing the “Choose …” button. When finished, press the “Generate Report” button. While running, the button should now say “generating …”. When finished, a web browser should automatically open the results like shown below.
Notice, you can just click links to see plots and run UCSC In-Silico PCR. Even though the 9th example exon is a complex alternative splicing event, PrimerSeq designed the primers on highly included flanking exons. This allows primer design for more cases then just simple skipped exon events while simultaneously keeping PCR product lengths reasonable. For detailed instructions on running and configuring PrimerSeq, please read the user tutorial.